📅 Scheduling
Scheduling Tool on xMagic
The Scheduling tool in xMagic allows you to integrate popular scheduling services like Cal.com and Calendly to automate your appointment bookings. This guide will help you configure the tool, connect it with your preferred scheduling provider, and set up the required fields for a smooth operation.
Setting Up Your Scheduling Tool
1. Select Your Booking Provider
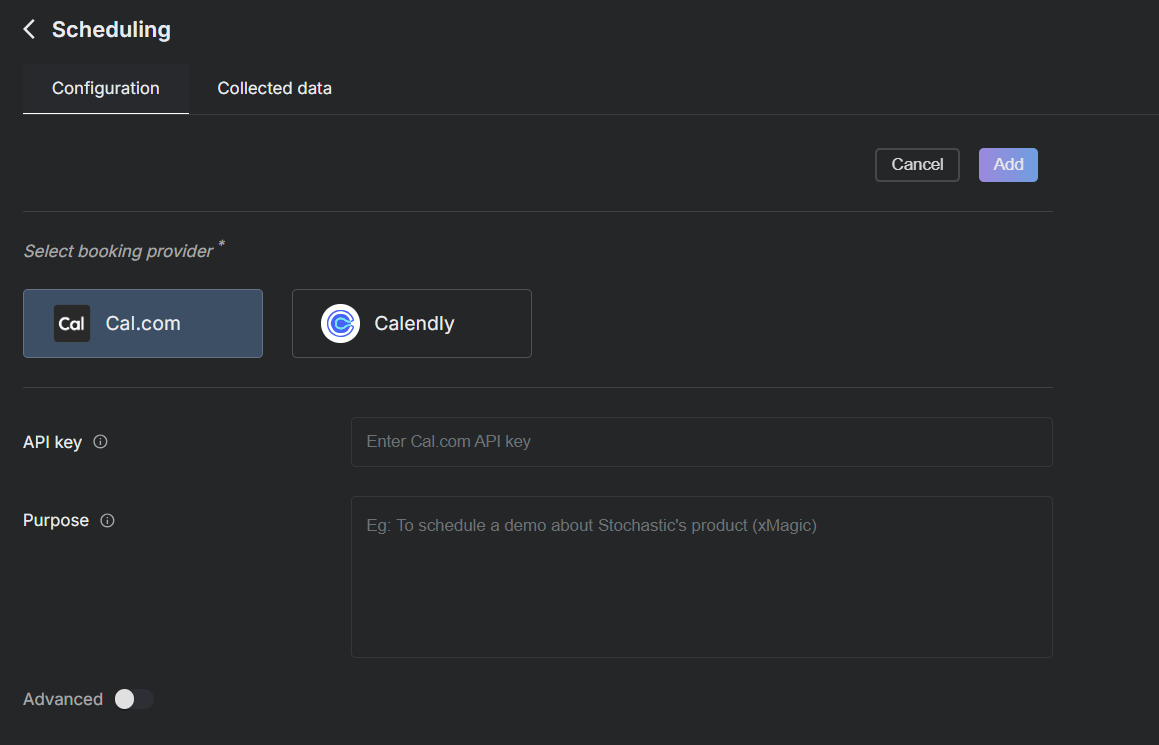
Choose your preferred booking provider from the available options:
- Cal.com
- Calendly
Enter the API key for the chosen provider to enable integration. Also enter the purrpose of the meeting so that meetings are scheduled only for that reason.

2. Configuring Advanced Options
Under the advanced section, you can specify additional instructions for the AI, manage email notifications, and define custom form fields to gather necessary information before booking an appointment.
Instructions: Provide guidelines that the AI should follow.
Email: Toggle to receive responses directly via email once data is collected.
Form Fields: Add and customize fields such as name, date of birth, or any other information required.

Utilizing the Tool
Once configured, the tool will automate the process of scheduling based on the criteria and fields you have set up. This can significantly streamline appointment setting and ensure all necessary information is collected beforehand.
Ensure that all settings are saved and verified to guarantee the tool functions as intended.
For further customization or assistance, refer to the API documentation of your scheduling provider or contact support.
This setup ensures that your scheduling process is efficient and tailored to meet the specific needs of your business or service.