📝 Form Filling
Form Filling Tool
The Form Filling tool in xMagic allows you to create customizable forms for various applications such as loan applications, event registrations, and more. This tool automates the data collection process, making it efficient and structured.
How to Set Up a Form
-
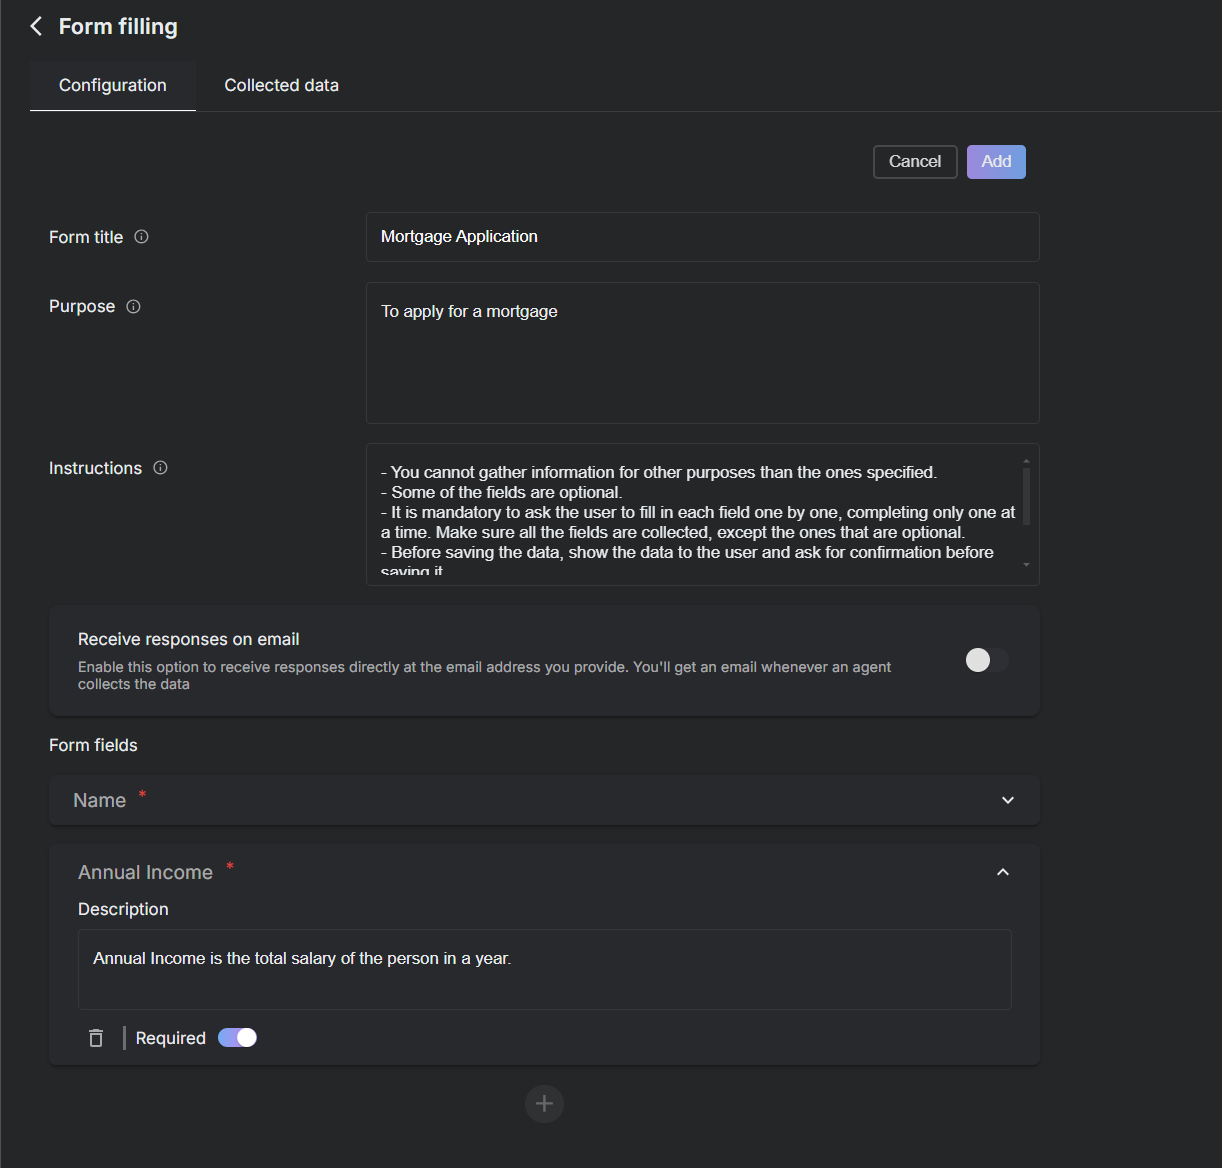
Navigate to the Form Filling Section:
- Go to the
Configurationtab and selectForm Filling.
- Go to the
-
Configure Your Form:
- Form Title: Enter a name for the form, such as "Mortgage Application."
- Purpose: Describe the purpose of the form, e.g., "To apply for a mortgage."
-
Set Up Form Fields:
- Add fields such as 'Name', 'Annual Income', etc., and specify whether they are required.
-
Advanced Options:
- Toggle the
Advancedswitch to access additional settings such as:- Instructions: Provide specific instructions for the form, such as guidelines on how each field should be filled.
- Email: Toggle 'Receive responses on email' to get form submissions directly to your inbox.
- Toggle the
-
Save and Publish Your Form:
- Once all fields are configured, click
Create formto save and enable the form.
- Once all fields are configured, click
Adding More Forms
-
After your initial form is set up, you can add additional forms tailored to different needs or events by clicking on the
Create formoption top-right and following the same steps. Each form can be customized with its own fields, purpose, and instructions.
Managing Collected Data
- After forms are submitted, you can view and manage the data collected under the
Collected Datatab. This allows for a streamlined process for reviewing submissions and integrating them into your workflows.
By utilizing the Form Filling tool, you not only simplify the data collection process but also enhance the user experience and data quality, making it more structured and less prone to errors.