Building Your AI Study Copilot With xMagic: A Student's Guide
Introduction
Welcome to the tutorial guide on using xMagic to create your AI study copilot! In this guide, we'll walk you through the steps to build an AI-powered study assistant chatbot using your classroom files. xMagic empowers your learning journey, providing valuable assistance and support throughout your studies.
Step 1: Gathering Your Classroom Files
First, gather all the relevant files from your classroom, including lecture notes, textbooks, assignments, and study materials. Ensure that you have digital copies of these files accessible on your computer or cloud storage. The files must be in PDF format. You can upload your files individually or import your files by connecting your Google Drive.
Step 2: Setting Up Your xMagic Account
If you haven't already, sign up for an xMagic account. You can do this by following this link: xMagic. Once you've created your account, log in to access the xMagic platform.
Step 3: Creating Your Study Copilot Project
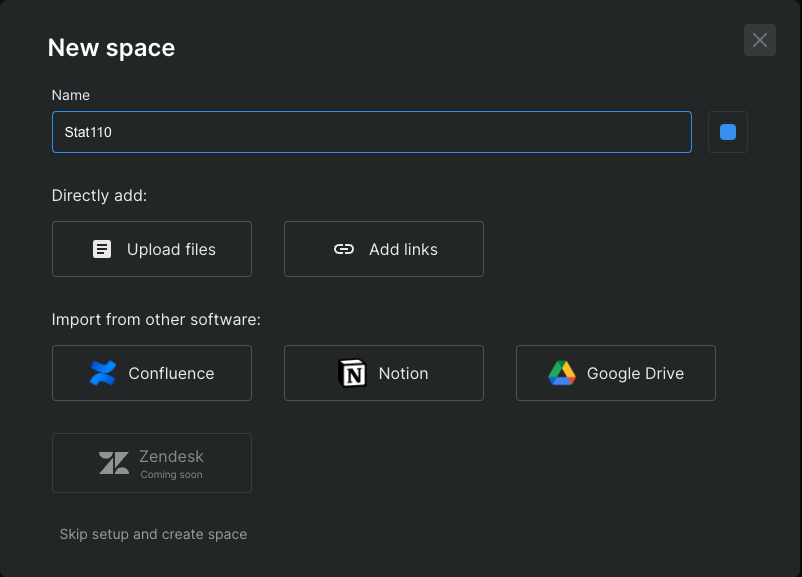
In the xMagic dashboard, click the “New space” button on the right side panel. Give your space a descriptive name, such as the subject title of your files. For example: Stat110.
Step 4: Uploading Your Classroom Files
Next, upload the classroom files you gathered earlier into your xMagic space. Click “Upload files” to upload your PDF files, or click “Add links” if your file comes from a website. You can also connect your Google Drive by clicking the “Google Drive” logo under “Import from other software.” These files will serve as the basis for training your AI study copilot.
Step 5: Interacting with Your AI Study Copilot
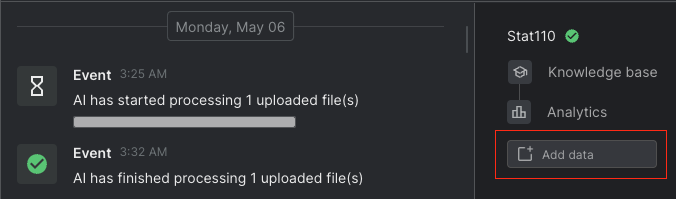
Once your files are uploaded, it will take 5 minutes or less for xMagic to analyze the content of your files and create a customized AI model tailored to your study needs. If you need to add more files, you can click “Add Data” on the left side panel of the xMagic platform.
After training is complete, you can start interacting with your AI study copilot chatbot. Use the chat interface in xMagic to ask questions, seek clarification on concepts, and request study assistance. Your AI study copilot chatbot will provide helpful responses based on the knowledge it has acquired from your classroom files.
Step 6: Fine-Tuning and Iterating
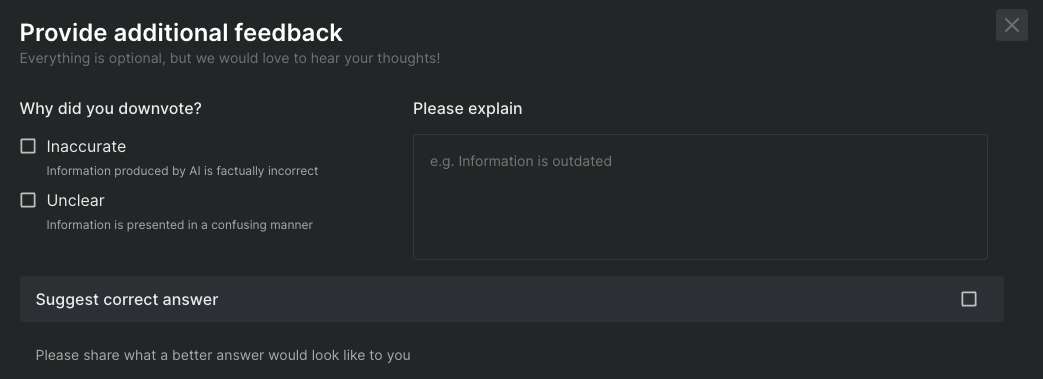
As you use your AI study copilot chatbot, you may encounter areas where it can be improved. Use the feedback and evaluation tools in xMagic to fine-tune your AI model and iterate on its performance. With each iteration, your study copilot chatbot will become smarter and more effective in assisting you with your studies.
Sharing the AI Study Copilots With Classmates and Friends
To invite your classmates and friends to your AI study copilot chatbot, click the three dots on the top right side panel and click “Share.” Enter your friends' email addresses and choose to invite them as an admin, editor, or member.
Your classmates and friends will receive an email invitation to join your AI study copilot chatbot, and once they sign up, they can now access your chatbot. This allows you to collaborate on projects, study together, and enhance your learning experience collectively.
Invite your classmates and friends to join, and make studying a collaborative and engaging activity!
Conclusion
Congratulations! You've successfully created your AI study copilot chatbot using xMagic. By leveraging the power of AI, you can enhance your learning experience and improve your academic performance. Experiment with the different features and functionalities of xMagic to discover new ways to optimize your study routine. Happy studying!